Phish submissions
As part of your continuous email security posture, administrators and security analysts need to submit missed phish samples to Cloud Email Security (formerly Area 1) Service Addresses so Cloudflare can process them and take necessary action.
Sometimes phish is missed as Cloudflare Cloud Email Security uses several techniques to make a detection. These include preemptively crawling the web to identify campaigns, machine learning, custom signatures, among others. In order for Cloud Email Security to identify why phish was missed, we need to run the original samples through our module and identify why some of our modules did not score the sample high enough to elevate it to malicious.
Submitting missed phish samples to Cloudflare is of paramount importance and necessary for continuous protection. Submitting missed phish samples helps Cloudflare improve our machine learning (ML) models, and alerts us of new attack vectors before they become prevalent.
How to submit phish
There are two different ways to submit a phish sample:
User submission: Submitted directly by the end users, and used with phish submission buttons.
To learn more about user-submitted phish, refer to the following documentation:Team submission: To be used when IT administrators or security teams submit to Cloud Email Security. Submit original phish samples as an attachment in EML format to the appropriate Team Submissions address. For example, if you think an email should be marked as spoof, send it to the
SPOOFaddress listed in Team Submissions.
Phish samples submitted to this address will be considered as submissions from the customer’s email security team. This increases the chances of similar samples being detected as malicious in the future.
After submitting a phish sample to the team address, you will receive an update from [email protected] regarding the investigation and the verdict. The feedback is directly provided to customers by our threat research team, bypassing the support channel, to expedite the process.
What happens after a phish submission
After you or your users submit a phish sample, Cloud Email Security adds that sample directly into our machine learning (ML) queue for learning. Some samples will be directly converted to MALICIOUS upon going through machine learning and the rest will be further processed by our ML module.
Phish submission feedback
Use the following keywords to search for submitted phish samples on the Cloud Email Security dashboard:
phish_submissionuser_malicious_submissionteam_malicious_submission
On the Reasons column you will see the feedback regarding the messages found. If the ML module learns and detects it as phish, the Reasons column shows the details regarding it. If not, the information on this column shows up as phish submission.
If there is a phishing email that is repeatedly sent to users despite being submitted to Cloud Email Security for processing, contact support with the details of the problematic phish submission sample (alert ID or message ID of the sample).
Phish Submission Response (beta)
Phish Submission Response (PSR) is an additional layer of protection. When you enable PSR, Cloud Email Security will automatically retract messages reported by users which are also deemed malicious by Cloud Email Security after analysis. This feature uses machine learning margin scores by adding the user as an additional neuron into Cloud Email Security’s neural network.
To enable PSR:
- Log in to the Cloud Email Security dashboard.
- Go to Settings (the gear icon).
- In Email Configuration, go to Retract Settings > Auto-Retract.
- Enable Phish Submission Response (Beta).
False positives
If you find emails in your Cloud Email Security account that are actually false positives, you can report them from the Cloud Email Security dashboard:
- Log in to the Cloud Email Security dashboard.
- Select the Search bar.
- Search for one or more messages that you want to report as a false positive, and select Report as false positive.
- In the next screen, choose a disposition from the list to clarify the nature of the false positive. The options are Bulk, Malicious, None, Spam, Spoof and Suspicious.
- Select Report False Positive.
False negatives
Cloud Email Security administrators can also submit false negatives directly from the dashboard:
- Log in to the Cloud Email Security dashboard.
- Select the Search bar.
- Search for one or more messages that you want to report as a false negative, and select Report as False Negative.
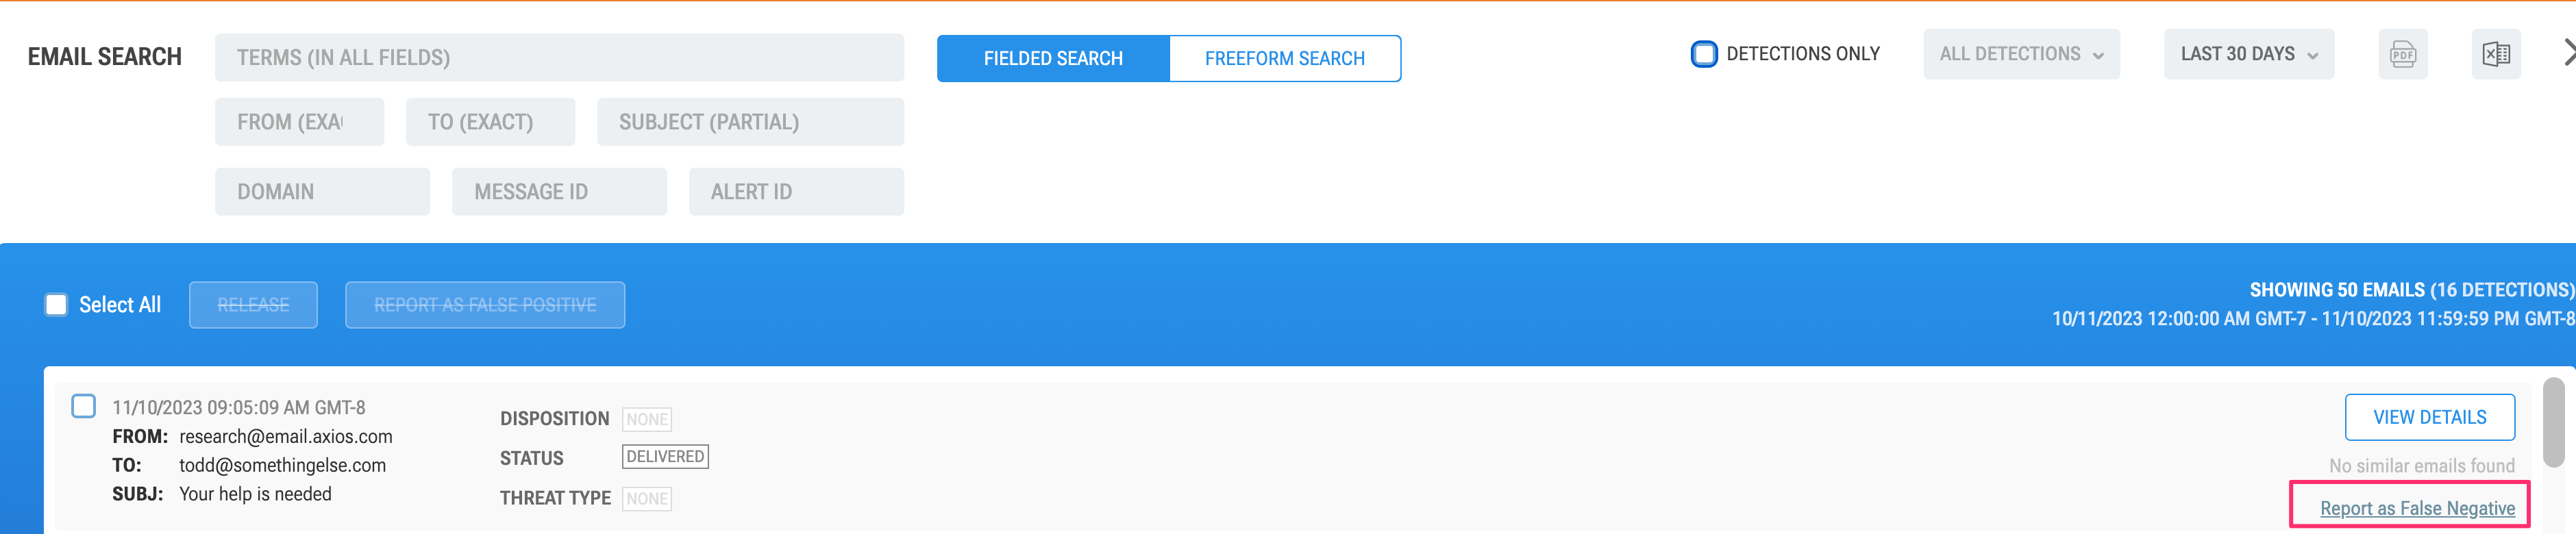
- In the next screen, choose a disposition from the list to clarify the nature of the false negative. The options are Bulk, Malicious, Spam, Suspicious and Spoof.
- Select Report False Negative.