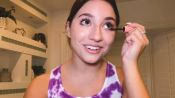
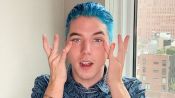
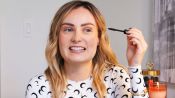
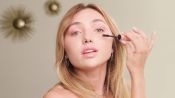
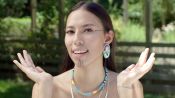
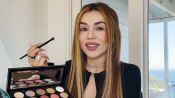
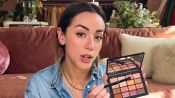
Olivia Ponton's 10 Minute Routine for A Quick Nighttime Look
Released on 12/07/2021
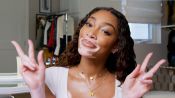
Hey, allure.
What is up?
It is Olivia Ponton and today we are doing my quick,
easy night-time look for my 10-minute video routine.
[timer counting]
So my first product that I'm going to be using
is my NARS Radiant Primer.
So take a little bit and just kind of rub that all over.
Next, what we are going to be taking is my concealers.
And I have a few concealers, I have three of them,
but we are only going to be using the NARS Concealer
and the Anastasia Beverly Hills Concealer.
The NARS one, I'm going to be using
to kind of cover up any blemishes
that I have on my face at the moment.
So I just put the Anastasia under my eyes
and then the NARS for my pimples.
I'm just going to put some more on right here.
So we take the beauty blender for under my eyes,
and then I even bring it up above my eyes
because your girl has veiny eyes, which is a weird thing
but we just make sure they're all concealed.
So then we just take my fingers
and I literally will rub my NARS Concealer,
like pat it almost even.
When I asked a makeup artist, this,
she was like, Yeah, one thing
that they don't tell you is that like you need
to be applying their concealer with your fingers.
I went home and tried it the next day
and was like, oh, this just sits way better on my face.
So I'm going to be using two different foundations.
The first foundation that we're using is a La Mer,
the soft fluid long-wear foundation.
And it also has SPF in it,
which I feel like is a hidden tip
to always wear SPF in your foundation if you can find it.
Then I also use the Giorgio Armani Luminous Silk Foundation,
and I kind of mix them together.
In the beginning, I did not believe in beauty blenders,
I literally was like, I'm not going to get on the trend.
I don't think that they really work.
I would always use my fingers
or I would use like I had a huge brush set
and was like, I'm just gonna use my brushes
and then I started getting my makeup done professionally,
and I just noticed every single makeup artist
using a beauty blender on me.
I'm like, so am I missing something?
Are these actually that good?
And I just got recommended a bunch of times
by numerous makeup artists to use beauty blenders,
so I was like, you know what,
if the professionals are using them,
I feel as though that I should you know give it a shot.
For my next product we have
the Patrick TA face sculpting contour palette.
And I take a lot of this.
This I would say is probably my biggest tip.
You use a lot of contour because especially this product
it's really good for sculpting your face.
So if you don't have super high cheekbones like myself,
you definitely can like finesse your way with this product.
And you always place your bronzer higher
than what your actual cheekbone is.
So I take it back and I literally will put it
all up right here and I apply a lot a lot a lot of on
because I feel like you can blend it out
later in the process but it's better
to put more bronzer on in the beginning than at the end.
And then I also bring it up to my forehead
because in eighth grade I got called a five-head
for an entire year.
So I've been [laughs] really oddly insecure
about the size of my forehead ever since.
And I literally just will put it right on like that.
And then I will bring a tiny bit down just right here.
And I feel like that's also a makeup tip
that a lot of people forget is to bring down
your makeup because your face can be slayed,
but then your neck is over there
like what happened to me?
Now what you do after you can see where the lines are.
You literally just blend, blend, blend, blend, blend.
My next step is going to be blush
and I'm using this Melt Sandy Cheeks Cream Blush light.
I don't take a lot of this because it's super prominent,
but I will just put a few little dots right here.
And I feel like with this color,
it kinda almost looks like you're a little sunburn
or you just came back from a day at the beach which,
you know, me love being at the beach. God bless that.
So now we kind of go in reverse order again.
So we are going to take the same bronzer that we were just
using from Patrick Ta.
And now we are going to use the powder based one and also
going in with my tip.
You got to like really bring it up higher towards your
cheekbones to make it that like really, really extreme look.
My next product is the hour glass blush in the color
diffused heat for me personally,
I don't like when it's like pink bronzer, normal face.
So I kind of mix in a little bit of blush
throughout my face, or I'll put a little bit
on like the bridge of my nose.
And then I'll also bring up a little bit to my forehead to
kind of just as if I just came back from the beach.
But, you know, unfortunately I didn't,
I woke up this morning,
so I'm going to be using these Charlotte Tilbury Pillow talk
highlighter.
And this went pretty viral on Tik Tok.
And I think it's because of the applicator and how prominent
it is.
And basically you literally just put like a few little dots
where your highlight goes.
And then since it is more of a cream based product,
I like to use my hands to rub it in my next product is also
a highlighter.
And it's the Rare Beauty one.
This one is a little bit more prominent.
And I also applied with my hands, this one,
a little goes a long way.
So I literally will put one little dot and then one little
dot.
And then I put a little bit on my nose.
People come from me with my nose highlight,
but I think it looks really, really good on photos.
And just like your day to day,
kind of brightens your face up a little bit of inner corners
of my eyes.
I like to really pull it across my eyelid because I feel
like it almost like opens up your eyes a little bit more
with the highlight because the shimmer part.
And then for the nose, I like to bring it across
the tip of my nose.
But then I also like to go on the flat part of my nose to
kind of like bring it a little bit more shimmer to the part
of it.
Next up is my eyebrows.
So I take the Patrick Ta soap brow and the Porefessional
super setter.
And I literally just do one little squirt of that,
this super setter being sprayed on the soap brow,
just kind of gets the soap wet.
So therefore it kind of has like more leeway with how you
kind of wanted your eyebrows and then an eyebrow spoolie.
And this is, I feel like something,
a lot of people ask me about is how I do my eyebrows because
I normally get them laminated.
But in New York I don't have anyone that laminates them.
So this stuff is my holy grail.
With this product I definitely like to do the
laminated effect on it.
I bring it up and like super arch it,
therefore it kind of leaves that like snatched look.
Guys, look at the difference between my eyebrows right now.
Like this is the laminated look and this is the not
laminated look like I don't know about you,
but it's pretty fire to me and I use it every
single day religiously. So God bless.
And you just really make sure you snatch that baby up.
My next product is the Benefit brow micro filling pen.
This is also a holy grail product because it literally gives
you like fake eyebrows.
For me I just use it to kind of like blend in
and fill in all the spots that you know are missing.
So I just take this product in the shade light brown
and draw on some fake eyebrows.
Now look at my eyebrows.
Like, I don't know if you can go back in the video
and then look again, but just completely different.
In my opinion, it like opens up my eyes like prepares
you to do your eye makeup 10 out of 10.
My next step is my hardest and scariest part.
It is eyeliner. And if you know me,
this is going to take awhile.
So I'm taking the Tom Ford eye defining pen.
What I do is I first off and I will sketch my eyeliner on my
eye.
And what I use is this Two Faced kitty likes to scratch eye
shadow palette, and I take the soft brown and the black,
I mix them together and I will kind of like sketch out my
liner if that makes any sense.
And then I go in with the actual eyeliner and trace it.
So for one of the final steps I just take an eyelash curler.
And my two good mascara is which is the Giorgio Armani one,
as well as the Revlon so fierce mascara's
and I apply these bad boys on.
Then I wipe the remaining mascara off with a simple brush.
Last step of my beauty routine is my lips.
I start off with the Charlotte Tilbury lipstick in the color
Pillow talk, and will literally put this all over my lips.
Then we are taking a YSL pretty coral color,
and I'm going to put it just right on the outsides.
And then I will blend this out with my fingers into more of
the middle of my lip.
Then last but not least is the Fenty Beauty gloss.
And I will just apply this right on top of everything.
I'm a huge gloss girl, I carry around.
I would say four different glosses in my purse at all times.
I'm also a huge lip plumping girl,
and this is their lip plumping gloss.
So may I add big fan of this product.
Lastly, lastly, lastly, my setting spray.
This is the Madison Beer Morphe collab.
Now you just air it out to make sure it dries all nicely.
And that is my face routine.
Thank you so much allure,
for following my 10 minute beauty routine, bye.
Maddie Ziegler's 10 Minute Makeup Routine
TikTok's Loren Gray's 10 Minute Makeup Routine
Skai Jackson's 10 Minute Makeup Routine

Sabrina Carpenter's 10 Minute Makeup Routine For Natural Light
A Ballerina’s 10-Minute Morning Makeup Routine
Alessia Cara's 10 Minute Beauty Routine For a Summery Look

Beauty Tutorial: How to Get a Glowy, Everyday Makeup Look in Just 10 Minutes with Armani Beauty

Mulatto's 10 Minute Beauty Routine For a Studio Session Look

Shalom Blac's 10 Minute Beauty Routine
Selena Gomez's Glowing Makeup Routine in 10 Minutes
Gabourey Sidibe's 10 Minute Brunch Beauty Routine

NIKI's 10 Minute 'On-the-Go' Makeup Routine

Saweetie's 10 Minute Touch Up Beauty Routine

Meghan Trainor's 10 Minute Beauty Routine for Zoom Meetings
Dulcé Sloan's Stunning 10 Minute Beauty Routine
Liza Koshy's Glowy 10 Minute Beauty Routine
Amber Ruffin's 10 Minute Nail Routine
DaniLeigh's 10 Minute Zoom-Ready Beauty Routine

Barbie Ferreira's 10 Minute Photo-Ready Beauty Routine
kenzie Ziegler’s Glossy 10 Minute Beauty Routine
Lilly Singh's 10 Minute UV-Protected Beauty Routine

Zara Larsson's 10 Minute Extra-Fresh Beauty Routine

Taraji P. Henson's Joy-Boosting 10 Minute Beauty Routine

Alicia Keys' No-Fuss 10 Minute Beauty Routine | Allure
Martha Stewart's 10 Minute Morning Beauty Routine

Tinashe's 10 Minute Beauty Routine For Perfect Eyebrows & Blush

Bebe Rexha's 10 Minute Beauty Routine For a Light Look
Grace VanderWaal's Dewy 10 Minute Beauty Routine

Nessa Barrett's 10 Minute Makeup Routine for Fake Freckles

Stassie Baby's 10 Minute Routine for a Sun-Kissed Look

Halsey's 10 Minute Routine for a Fresh-Faced Look
Hyram Yarbro's 10 Minute Routine for Oil Control & Sun Protection

Anitta's 10 Minute Sweat-Proof Beauty Routine

Sophia Bush's 10 Minute Beauty Routine For Brows & Under Eyes

Madison Beer's 10 Minute Beauty Routine for a Glowy Blush Look

Amanda Steele's 10 Minute Routine for Dry Skin & Cat Eyes
Piper Perabo's Minimal 10 Minute Beauty Routine

Ashley Strong's 10 Minute Routine for Lips & Skin
Nina Dobrev's 10 Minute Routine for Thick Brows & Plump Skin
Lauren Giraldo's 10 Minute Routine for Curled Lashes & Bushy Brows
Molly Burke's 10 Minute Blind Beauty Makeup Routine
Olivia Ponton's 10 Minute Routine for A Quick Nighttime Look
IZA's 10 Minute Routine for a Natural Makeup Look
Charlotte McKinney's 10 Minute Beauty Routine For A Fresh Glam Look

Pony Park's 10 Minute Beauty Routine (Winged Eye and Soft Eyeshadow)

Karrueche Tran's 10 Minute Beauty Routine for a Natural On-The-Go Look
Peyton List's 10 Minute Beauty Routine for a Sun-Protected Shimmery Look

Laura Lee's 10 Minute Beauty Routine for Winged False Lashes and Full Brows
Karol G's 10-Minute Makeup Routine for a Natural Look
Patrick Starrr's Euphoria-Inspired 10-Minute Makeup Routine
Aaliyah Jay's 10-Minute Beauty Routine for Dry Skin

Charly Jordan's 10-Minute Beauty Routine for Acne
Winnie Harlow's Quick 10-Minute Beauty Routine

Sydney Sweeney's 10-Minute Beauty Routine for Sensitive Skin

TikTok Star Emma Norton's 10-Minute Beauty Routine
Bel-Air Star Coco Jones's 10-Minute Beauty Routine

TikTok Star Meredith Duxbury's 10-Minute Beauty Routine
Yasmeen Fletcher's 10-Minute Beauty Routine

Joey King's Quick 10-Minute Beauty Routine

Idris and Sabrina Elba's 10-Minute Beauty Routines
Maitreyi Ramakrishnan's Trick to Perfect Winged Liner

Charli D’Amelio's Quick Beauty Routine for Acne-Prone Skin
Model Quannah Chasinghorse's 10-Minute Beauty Routine

Bella Poarch's Everyday Makeup Routine
Quinta Brunson's 10-Minute Beauty Routine
Kat Graham's 10-Minute Smoky Eye Routine
Huda Kattan's Everyday Glam Beauty Routine

Madelyn Cline's 10-Minute Beauty Routine
Ava Max's 10-Minute Beauty Routine
Rachel Bilson's Glowing Sun-Kissed Beauty Routine
Rita Ora's 10-Minute Rockstar Blue Eyeshadow Look
Sasha Colby's 10 Minute Out-of-Drag Makeup
Chloe Bennet's 10-Minute Makeup Routine for a Fresh Spring Look

Murder, Mystery & Makeup’s Bailey Sarian's 10-Minute Beauty Routine

Lucy Hale's 10-Minute Routine for Real Skin and Feathered Brows
Kelsey Merritt's 10-Minute Glowy Everyday Makeup Routine

Alia Bhatt's 10-Minute "Sunburned" Makeup

Alix Earle's 10-Minute Makeup Routine for Acne-Prone Skin

Jay Park's 10-Minute Daily Skincare and Hair Routine
Lori Harvey's 10-Minute Beauty Routine for '90s Soft Glam
Isabela Merced's 10-Minute Classic Beauty Routine

Brooke Shields' 10-Minute Routine for Hair Care Over 40 and Beachy Waves