Azure SSO and SCIM
Access Required
You must be an admin to access the SSO/SCIM page in Manage and to set up SSO for your team.
Setting up Microsoft Azure SSO for Guru
- Open the SSO/SCIM page in Guru.
- In another tab, sign in to the Azure portal as an Admin.
- Navigate to Azure Active Directory > Enterprise Applications.
- Click + New Application.
- Click + Create Your Own Application, enter "Guru" as the name of the app, select Integrate any other application you don't find in the gallery (Non-gallery), and then select Create.

Note
Azure may prompt you to choose an existing app named Guru during these steps. That is a different company - after typing "Guru" as the name of the app, choose to **Create Your Own Application** to make a new app.
- Under the Manage section on the left-hand column, select Single sign-on, then select SAML.
- For step #1, click the ✏️ Edit icon to edit the Basic SAML Configuration.
- Under Identifier (Entity ID) click Add identifier. Copy and paste the Audience URI from your team's SSO/SCIM page in Guru into the box.
- Under Reply URL, click Add reply URL and paste the Single Sign on URL from your team's SSO/SCIM page in Guru.
- Save. You might need to refresh the webpage to view the changes.
- For step #2, click the ✏️ Edit icon to edit User Attributes & Claims. Ensure that the configuration replicates the below screenshot - capitalization matters.


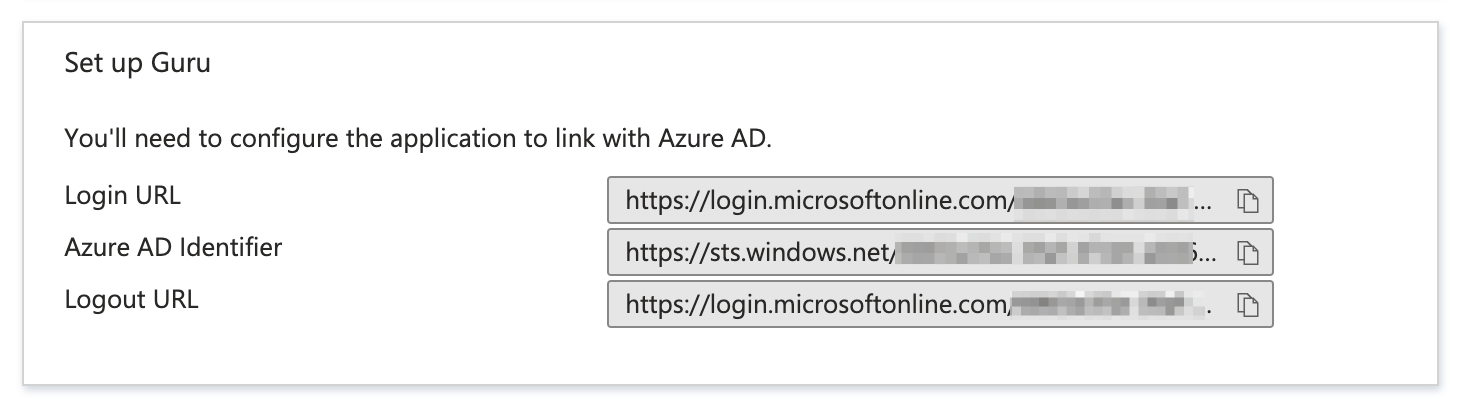
- Next, ensure the following mappings from Azure are input into the Guru SSO page:
- Identity Provider Single Sign-On Url is Login URL.
- Identity Provider Issuer is Azure AD Identifier.
- You can get the X.509 Certificate from the Certificate (Base64) opened as a text file.
- Once this is entered into Guru, you can toggle SSO to Enabled.
- Once you’ve finished configuring the Guru app, you will be prompted to test the connection in Azure. You're all set!
Setting up SCIM through Microsoft Azure
- Open the SSO/SCIM tab in Manage and toggle "Authorize SCIM Provisioning" to on.
- Navigate to your Apps landing page in Azure, select Provisioning under the "Manage" section in the left column, and click Get Started.
- Identify Automatic as your "Provisioning Mode".
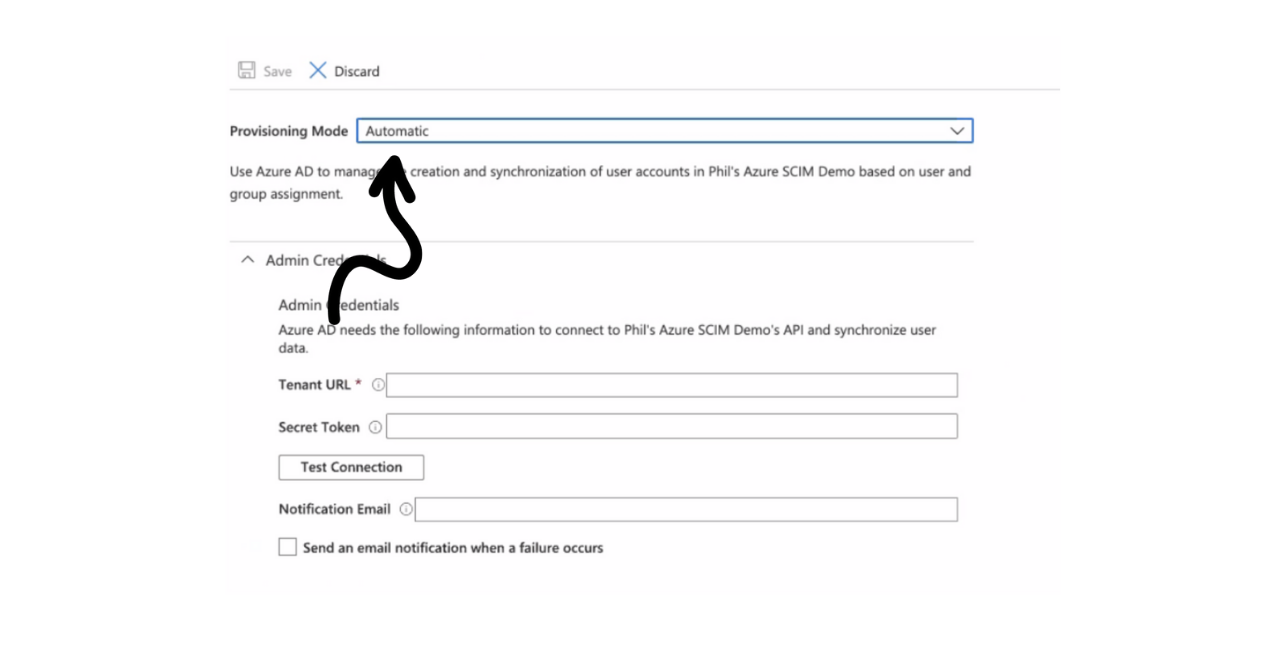
- For "Admin Credentials" enter the following:
- Tenant URL - https://api.getguru.com/api/scim/v2/
- Secret Token - Copy the SCIM Username and SCIM Token fields from the SSO/SCIM page in Guru, then paste both of these into this field separated by a colon.
- Confirm by selecting Test Connection (you should see confirmation in the top right corner of the page).
Note
To continue on to the next step you may need to refresh your page or select save. Then, back on the Guru app landing page, select **Edit Provisioning** at the top of the screen.
Provisioning Azure Active Directory Users
- Under "Mappings," choose Provision Azure Active Directory Users.
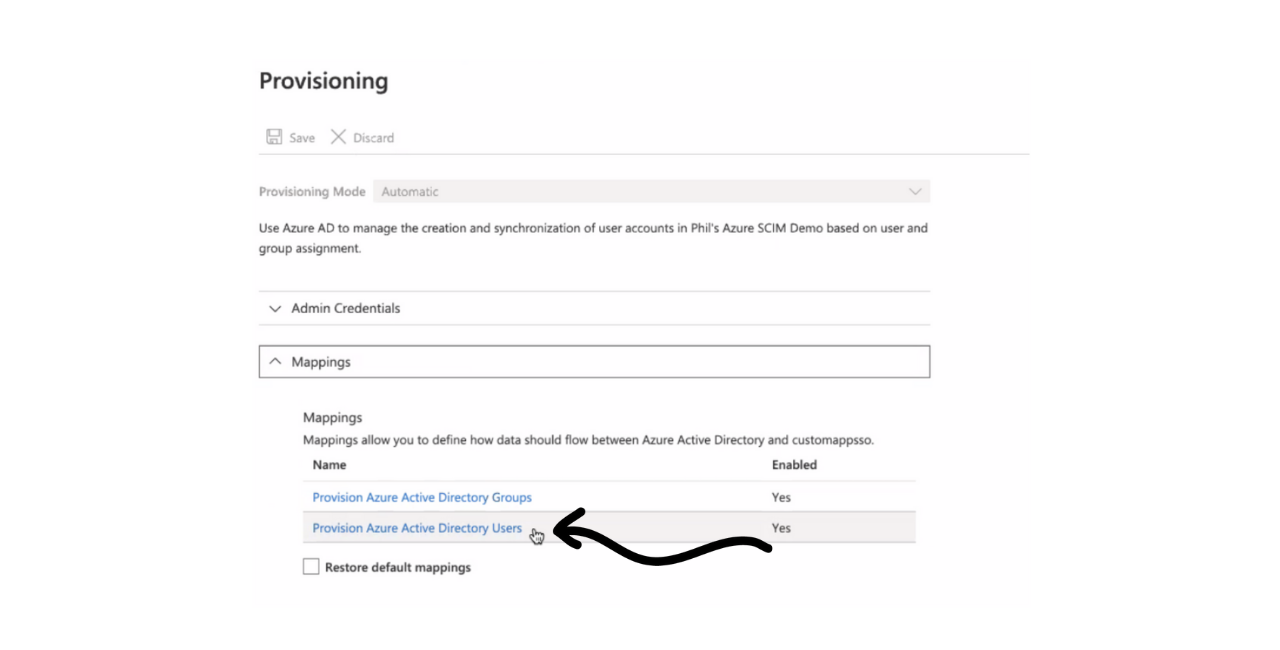
- Ensure "Enabled" is Yes and "Target Object Actions" Create, Update, and Delete are checked off. Your Attribute Mappings should mirror those listed below.
- Capitalization matters.
- The "customappsso Attribute" externalID needs to be updated from the default value to objectId.
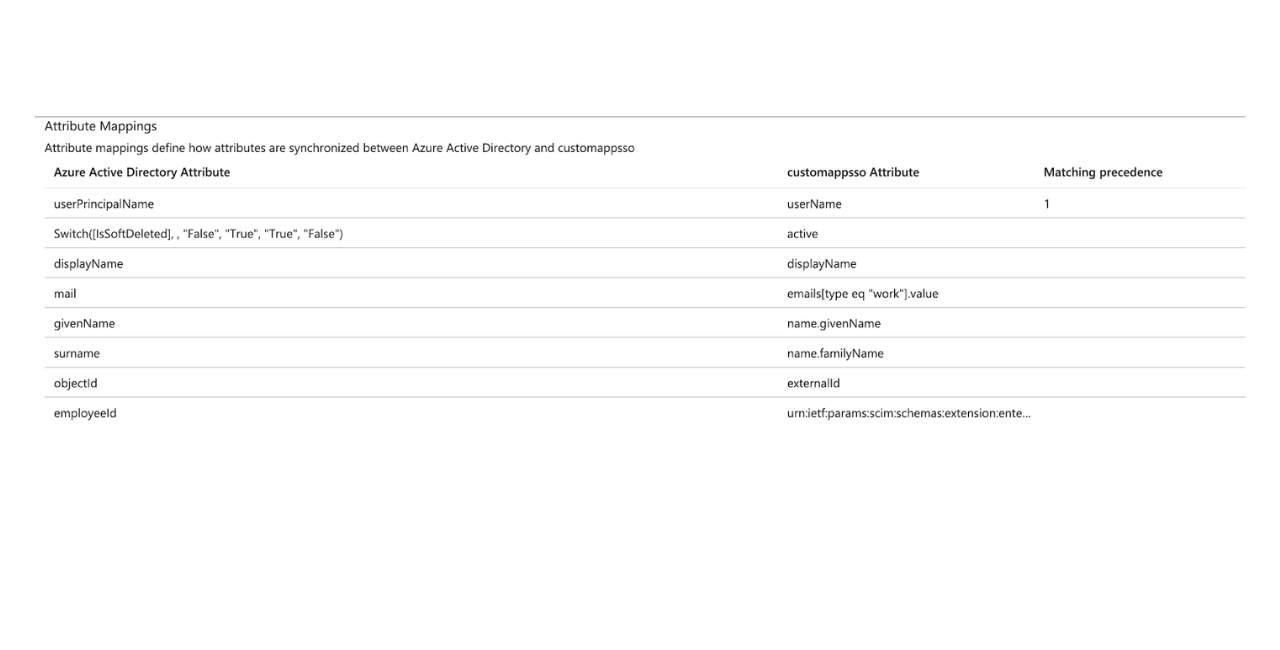
Attribute Mappings
| Azure Active Directory Attribute: | custommapsso Attribute: | Matching preference: |
|---|---|---|
| userPrincipalName | userName | 1 |
| Switch([IsSoftDeleted], , "False", "True", "True", "False") | active | |
| displayName | displayName | |
| emails[type eq "work"].value | ||
| givenName | name.givenName | |
| surname | name.familyName | |
| objectId | externalId | |
| employeeId | urn:ietf:params:scim:schemas:extension:enterprise:2.0:User:employeeNumber |
- Save these settings.
Provisioning Azure Active Directory Groups
- Under "Mappings," choose Provision Azure Active Directory Groups.
- Your Attribute Mappings should mirror those listed below.
- Capitalization matters.
- Ensure that Create, Update, and Delete are checked off.

Attribute Mappings
| Azure Active Directory Attribute: | custommapsso Attribute: | Matching preference: |
|---|---|---|
displayName | displayName | 1 |
objectid | externalId | |
members | members |
- Save these settings.
Start Provisioning
- After Provision Azure Active Directory Users and Provision Azure Active Directory Groups setup is complete, close the Provisioning screen.
- Click Start Provisioning to begin syncing users and groups in the Azure Enterprise application to your Guru team.
Updated about 2 months ago