OneLogin SSO and SCIM
Enabling SSO through OneLogin
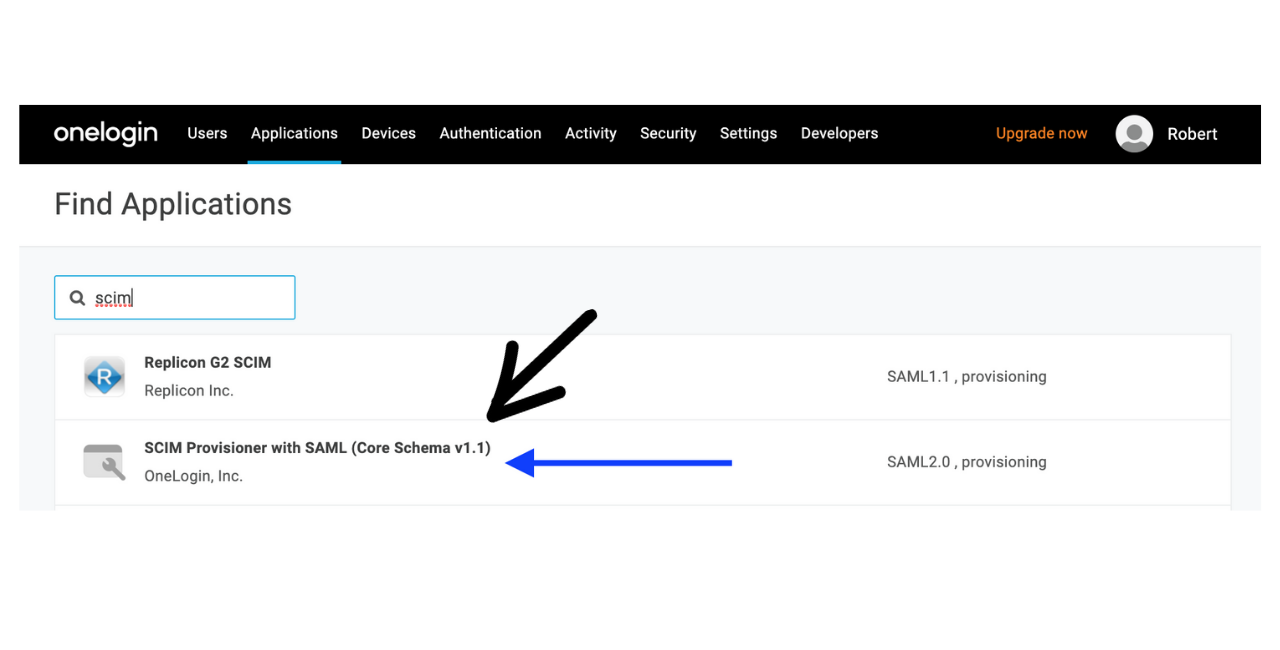
On OneLogin's Applications page, click Add App.
- Search for "SCIM" and select SCIM Provisioner with SAML (Core Schema v1.1).
- Enter "Guru" as the Display Name and download the linked Rectangular icon and Square icon files to use as icons.
- Save and go to the Configuration page in the left menu.
- In a new tab, open the SSO/SCIM page in Guru.
- Copy these values from Guru to OneLogin:
- Audience URI -> SAML Audience URL
- Single Sign On URL -> SAML Consumer URL
- For SCIM Base URL enter: https://api.getguru.com/api/scim/v2
Entering this value does not enable SCIM but OneLogin requires this value to be filled in.
- Save and go to the SSO page in the left menu.
- Copy these values from OneLogin to the SSO/SCIM page in Guru:
- Issuer URL -> Identity Provider Issuer
- SAML 2.0 Endpoint (HTTP) -> Identity Provider Single Sign-On Url
- In OneLogin under X.509 Certificate click View Details then copy the X.509 Certificate and paste into Guru.
- At this point your Guru configuration should look like this:
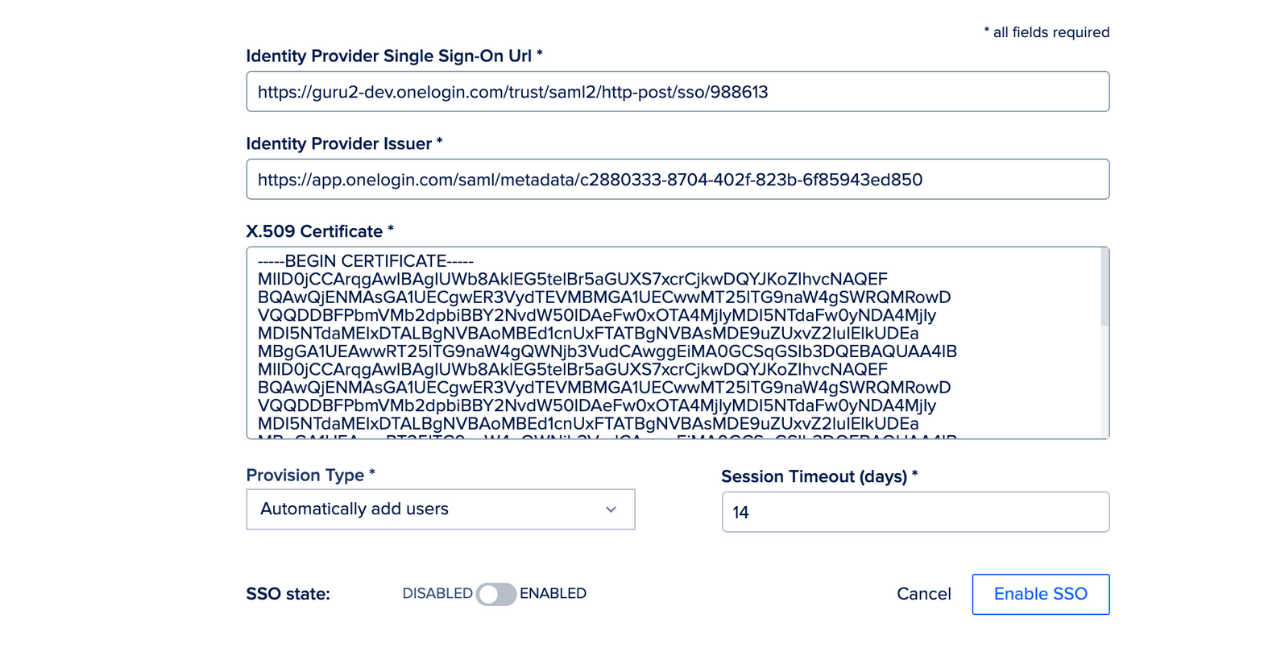
- Click Enable SSO in Guru.
Enabling SCIM through OneLogin
Access Required
You must be an admin to access the SSO/SCIM page in Manage and to enable or disable the feature in your workspace.
To enable SCIM in addition to SSO, follow these steps:
- Open the SSO/SCIM page in Guru and where it says Authorize SCIM Provisioning, click the toggle on.
- In another tab, go to the Configuration page in OneLogin for the Guru application.
- On the Configuration page, enter these values:
- For SCIM Base URL, you should already see:
https://api.getguru.com/api/scim/v2/. - For Custom Headers enter:
Content-Type: application/scim+json. - Copy the SCIM Username and SCIM Token fields from Guru, then paste both of these into OneLogin's SCIM Bearer Token field separated by a colon.
It'll look like this: c3a6408-207a-4508-92a3-d923cbcff50d:9aa5ac6f-aa10-41d2-87d3-4d09d830c109.
- Under API Status, move the slider from Disabled to Enabled.
- On the Parameters tab click the + to add a new parameter, then:
- For Name, enter "externalId".
- Check the boxes for Include in SAML Assertion and Include in User Provisioning and click Save.
- For Value, select OneLogin ID and click Save.
Important
If your OneLogin instance uses something other than email for Username, change the default value for the SCIM Username parameter from Username to Email.
- Save the Parameters page.
- On the Provisioning page, check Enable Provisioning and click Save.
Provisioning Groups in OneLogin
Note
OneLogin does not sync “Groups” to external platforms, but you can sync “Roles.”
- Assign users to a Role in OneLogin and ensure the Role is assigned to the Guru app. You can manage this from the Users tab at the top of the screen.
- Go to the Applications menu and click Add Rules under the Rules tab.
- Give the mapping a Name like “Map Role to Groups” (this field will not sync over to Guru).
- . Under Actions, select Set Groups in Guru and Map from OneLogin. For each role with a value that matches .*, set Guru Groups named after roles.
- Click Update to save these settings.
Updated about 2 months ago